
Organize Your Hockey Team in 4 Steps Using Gumb


In four simple steps your hockey team will be organized, laced up, on the ice, and ready to go. Gumb helps hockey teams get on the same page through better communication tools, organized team details, scheduling features, and more. You may think your hockey team is ready for the season to begin, but do you know who’s coming to practice? Is availability scattered? Do parents reach out via text, phone calls, emails, and more? It doesn’t have to be that way. The gumb.app helps coaches, parents, players, and admins by being the one place for all the information.
Here’s how you can organize your hockey team in four simple steps.
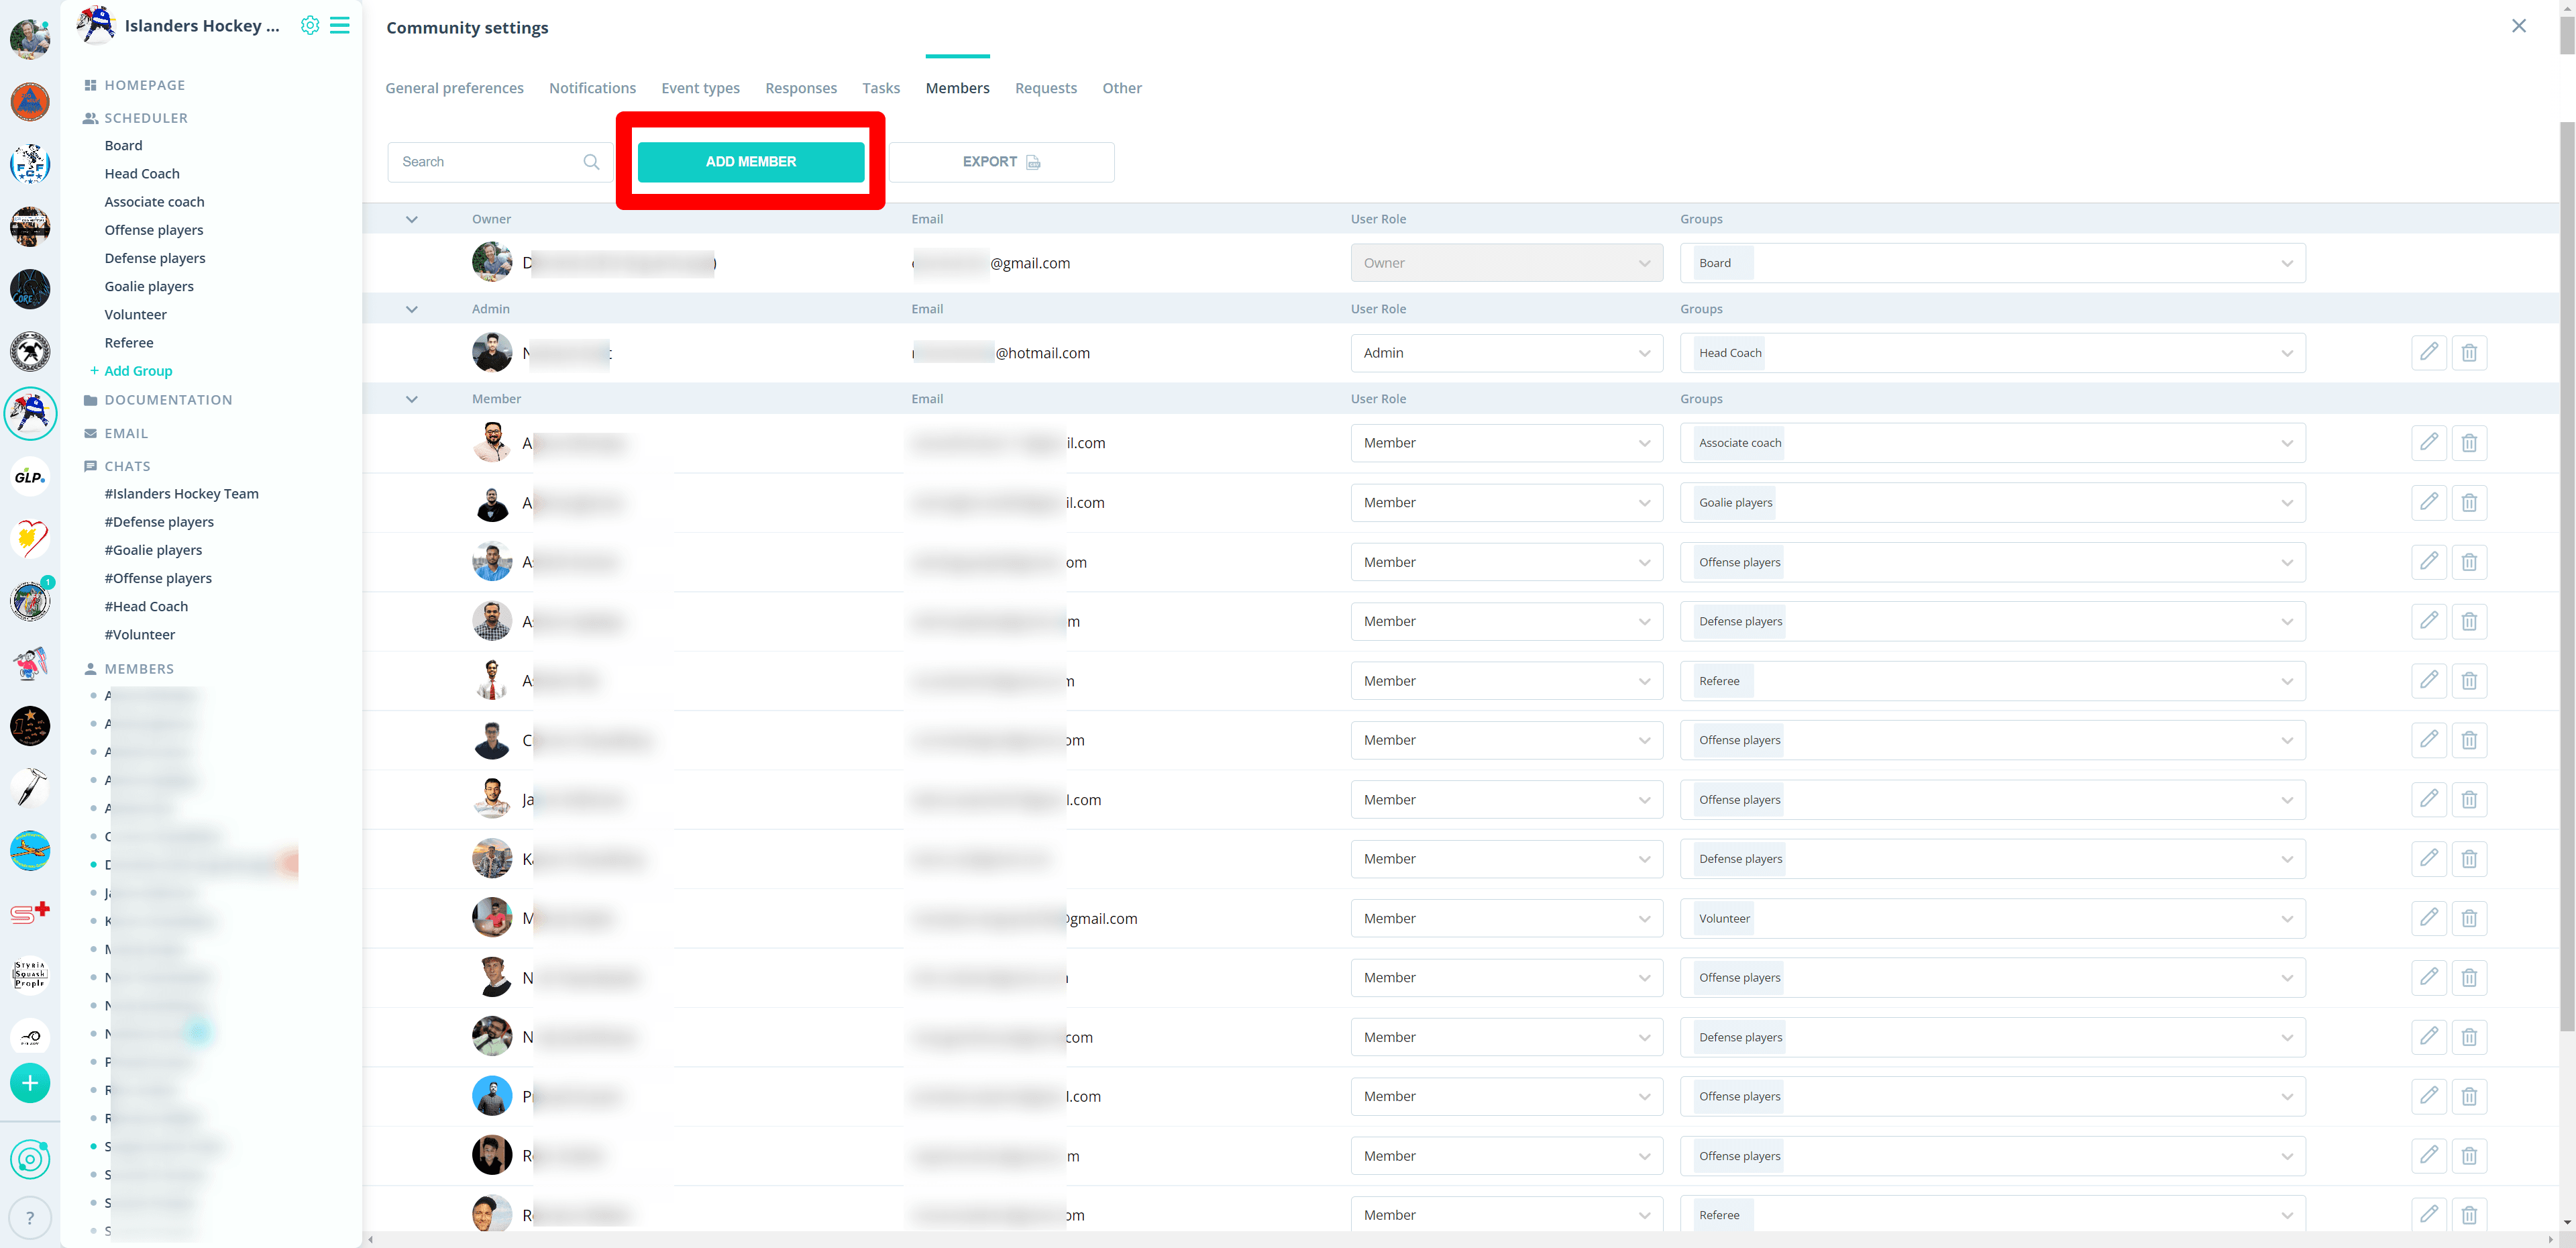
Step 1: Your team is set, now just invite the players to the gumb.app
At this point you’ve probably had tryouts, many phone calls, and long discussions over who’s going to be on the team this year. Once you have a sense of how many players and who has made the team, you can begin inviting them to the gumb.app. Rostering is made easy on Gumb, and here’s why:
- Members or parents can easily edit contact information, jersey numbers, positions and more from their phones or computers.
- Add a photo to a player or parent. This will help everyone put names to faces.
- Gather all the data you need with customizable fields.
- Easily separate coaches, players and non-players for easy viewing within the app.
Once you’ve added your roster, and here’s a step-by-step guide to help you invite players, you will want to add the schedule of events so your team knows when practices, games, and tournaments are.
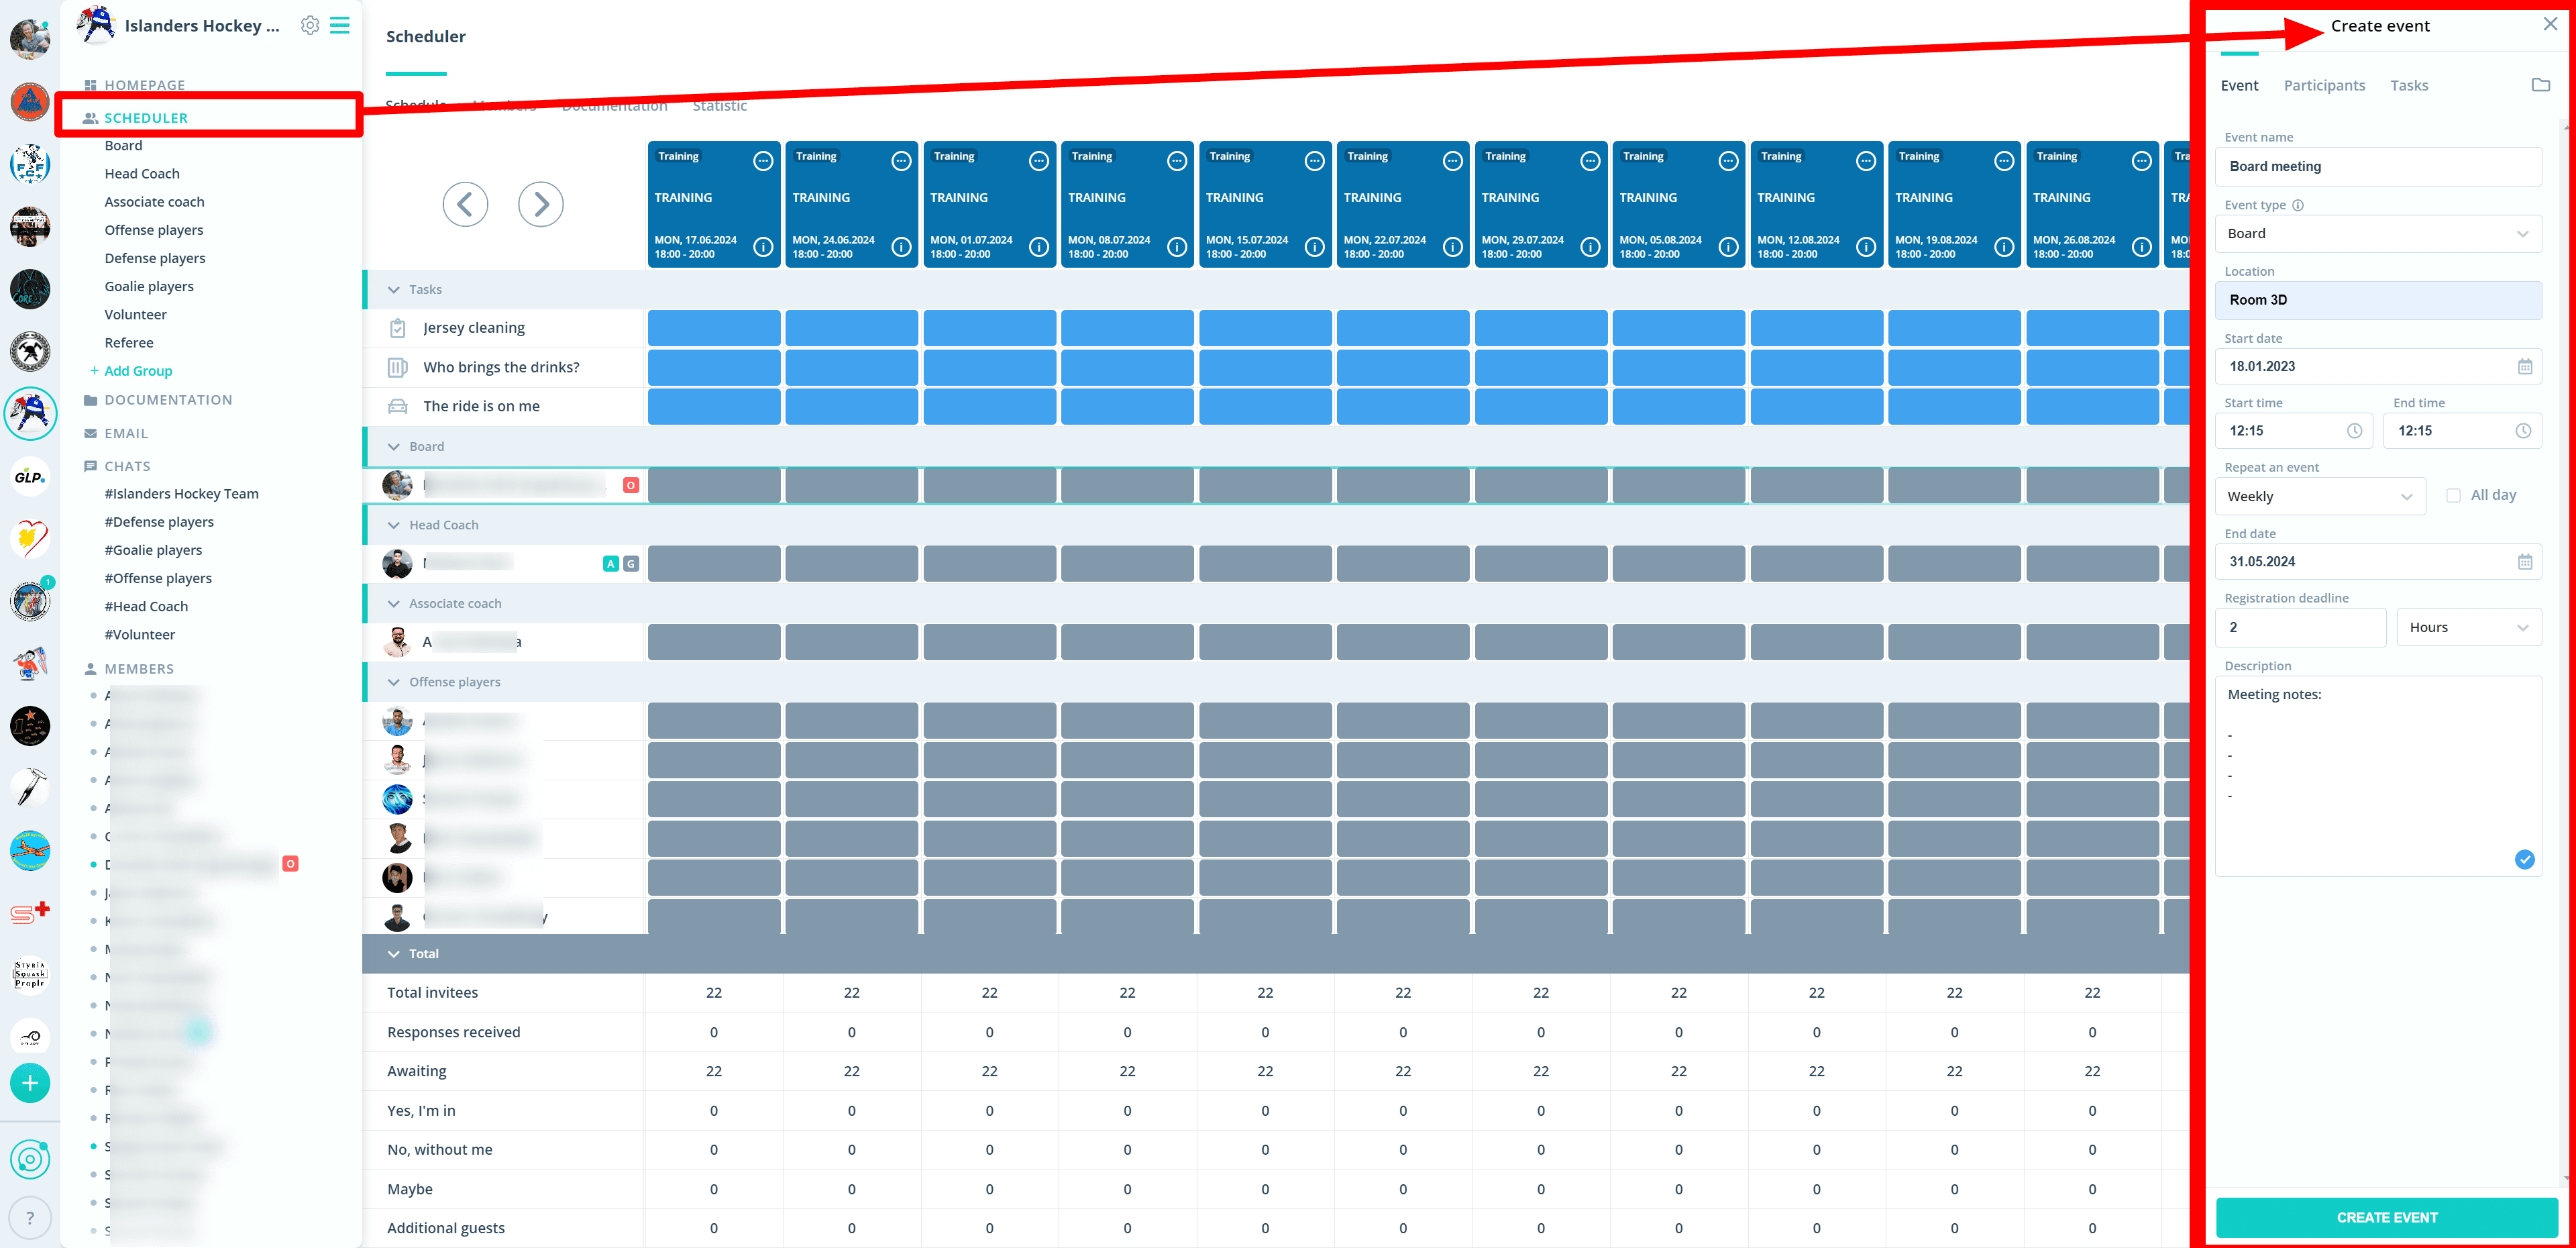
Step 2: Add the schedule.
Instead of leaving the schedule up for discussion and guessing, add it to the app so parents, players, and other coaches can see it and memorize it quickly. To make your life even easier, Gumb allows you to sync the calendar to your phone, so it really is hard to miss. The gumb.app scheduling feature allows you to edit dates, expected arrival times, opponents, the game results, and even the location with a Google Maps link. You’re not even limited to just scheduling games and practices; add in tasks, upload documents for events and more! Sync up your Google calendar now.
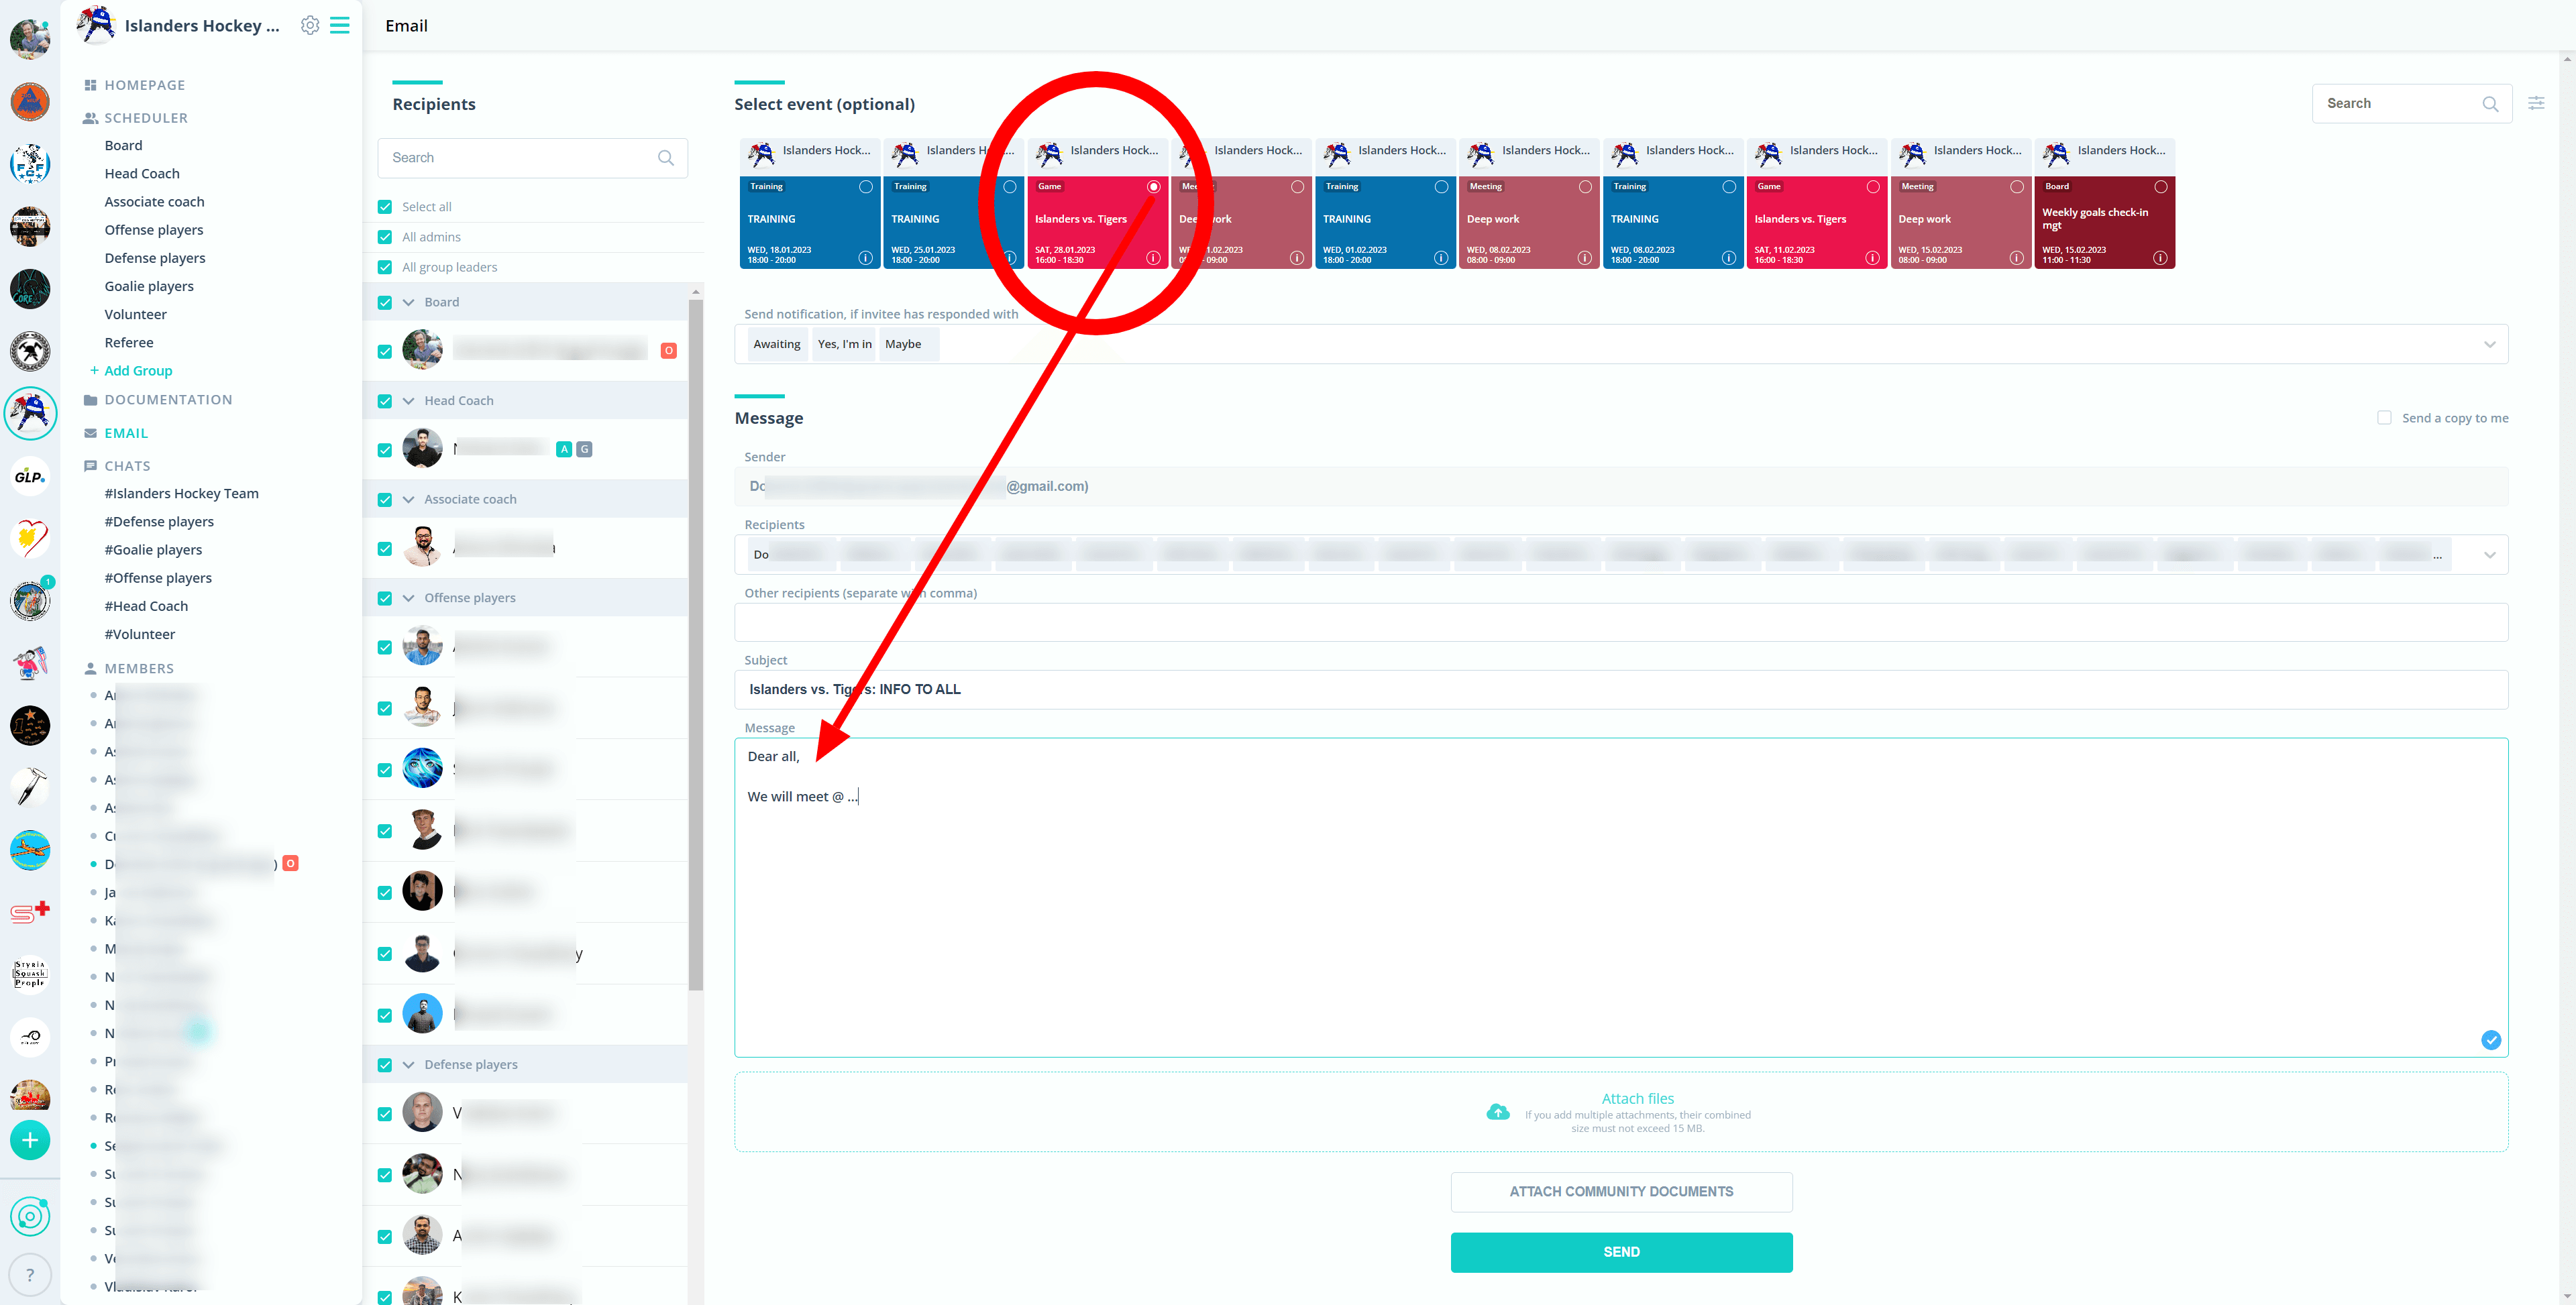
Step 3: Inform the team.
Now that the players are added, parents too, plus the schedule is up-to-date, it’s time to let everyone know. Gumb has an email feature that lets everyone get an email by pressing a button. The email feature is a hub for important messages to specific events and sending reminders. You can also set up automatic notifications in your community-settings so that everyone gets for example a reminder as mobile-push ahead of the training. Now that your schedule is live and everyone is under one roof, send a message to your team and let them know that you are excited for the season to start. In the email, you can also add important Gumb-links, or mention our support@gumb.app address, or send out specific messages to individuals. If you are waiting on a response from one player, reach out to them specifically instead of sending a big message to the whole team.
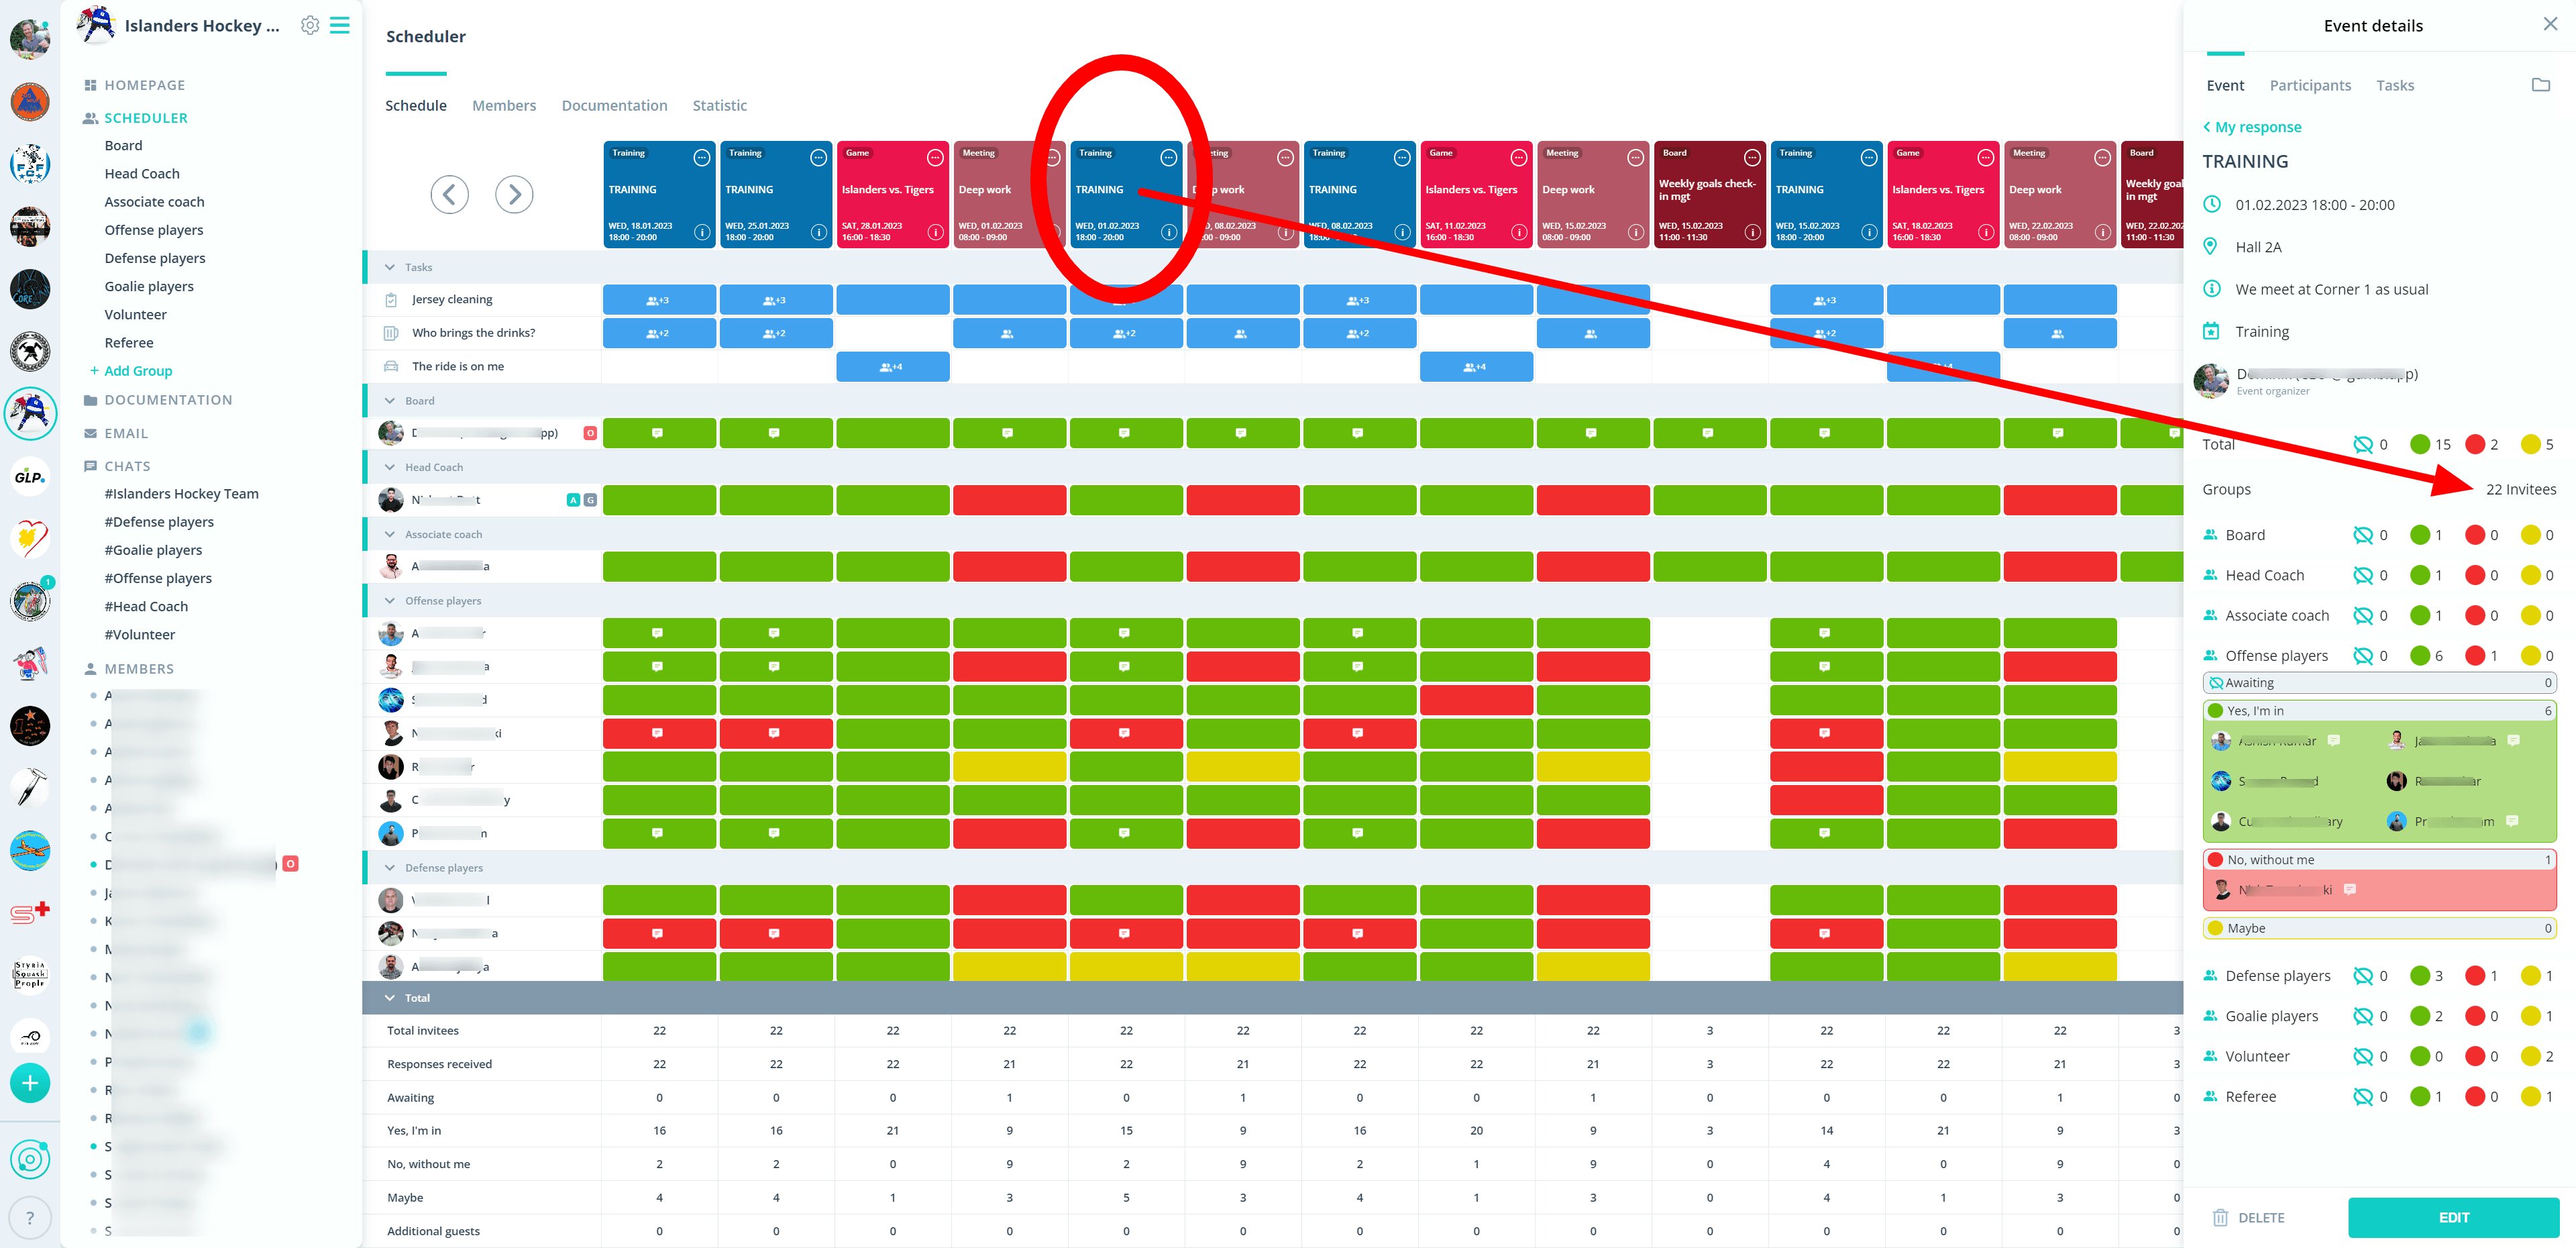
Step 4: Availability.
Now that you’ve done your part to get the team organized, it’s time to put the hockey stick and puck in the team’s hands. Use the availability feature to know who’s coming and make lineups ahead of time, so you can play to win. Looking for a headcount before practice? You can view each player and see which events they’ve attended or haven’t in the past.
In these 4-steps, your hockey season should be ready for a great season ahead. Get started today!